Getting Started with Carriots® IoT
This article teaches you how to develop an Internet of Things (IoT) application using Carriots® and Arduino Yún. Carriots® is an Internet of Things (IoT) platform (the name is an acronym for CARRying the Internet Of ThingS).
In this tutorial, you are going to develop a simple Weather Monitoring IoT application. This IoT application will sense temperature and humidity data and publish it to Carriots using the HTTP protocol.
Learning Objectives
At the end of this tutorial you will be able to:
- Design an IoT device that senses temperature and humidity
- Create required hierarchy in Carriots
- Write code to publish device data (stream) to Carriots
- Generate an interactive graph from device data in Carriots
Hardware
Note: If the model of Arduino that you are using comes with built-in WiFi capabilities then you do not need a separate WiFi Shield.
- Arduino Uno
- Arduino WiFi Shield
- DHT11 (Humidity + Temperature Sensor)
- Jumper Cables

Software
Circuit
Step 1: Make sure your Arduino is not connected to a power source.
Note: If the model of Arduino that you are using comes with built-in WiFi capabilities then you do not need a separate WiFi Shield and can skip this step.
Step 2: Attach WiFi Shield or Ethernet Shield on top of Arduino.
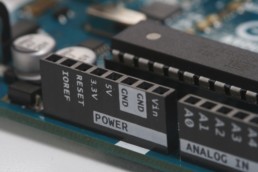
Step 3: Using jumper cables connect power (VNC) and ground (GND) ports on Arduino to power (+) and ground (-) ports on the breadboard.
Tip: It is a good practice to use red jumper cable for power (+ / VNC) and black jumper cable for ground (- / GND).
Step 4: Now that your breadboard has a power source, using jumper cables connect power (+) and ground (-) ports of your breadboard to power and ground ports of the DHT11 sensor.
Step 5: To read temperature and humidity values, you will need to connect a jumper cable from signal port of DHT11 sensor to D3 (Digital) port of your Arduino.
Your circuit is now complete and it should look similar to figures below.

Carriots' Setup
Before you can begin developing IoT apps using Carriots, you need to understand the hierarchy that has to be followed. The figure below provides an overview of the hierarchy.

- Projects: A project is the top of Carriots' hierarchy and helps you to manage your IoT projects by grouping services and devices into separate projects. In this tutorial, you will define Weather Monitoring as a top-level project.
- Services: Services are device or assets with common behavior e.g. Temperature and Humidity are two services under Weather Monitoring project.
- Groups: Groups helps in managing IoT projects by grouping devices. For example, as shown in the figure above Home and Office provide a logical grouping of all devices under the Temperature service.
- Devices: Devices are at the core of IoT projects. They are the virtual representation of "Things" in "IoT". When you send data (a.k.a streams) to Carriots they are always related to a device.
Now that you have a basic understanding of the platform, you can proceed with defining the required hierarchy of your IoT application.
Signup for Carriots.
Login to Carriots, you will be redirected to the Dashboard.

Create Project
Click on Projects from Hierarchy menu, this will take you to the screen with a list of all projects.

Click on + New Project. Enter Name and Description as provided in the screenshot below.

Click on Create Project. The newly created project will start showing up in Project List.

Create Service
Click on Services from Hierarchy menu, this will take you to the screen with a list of all service.

Click on + New Service. Enter Name and Description as provided in the screenshot below. Select WeatherMonitoring from Project drop-down.

Click on Create Service. The newly created service will start showing up in Service List.

Create Group
Click on Groups from Hierarchy menu, this will take you to the screen with a list of all service.

Click on + New Group. Enter Name and Description as provided in the screenshot below. Select Temperature from Service drop-down.

Click on Create Group. The newly created service will start showing up in Group List.

Create Device
Click on Devices from Hierarchy menu, this will take you to the screen with a list of all devices.

Click on + New Device. Enter Name, Description, Type, Sensor, Time zone and Group as provided in the screenshot below.

Click on Create Device. The newly created device will start showing up in Device List.

API Key
Next, you need to locate or generate API Keys for your account. API Keys allow your devices to securely communicate with Carriots platform.

Apikeys can be found under the Settings menu. Clicking on Apikeys will take you to the screen with a list of all Apikeys. In the next section, you will be using this Automatic Apikey Full for authentication and communication.

Code (Arduino Yún)
Next, you are going to write code for Arduino Yún to read temperature sensor data and publishing it to a Carriots stream.
Start your Arduino IDE and either type or copy the code provided below. All the code goes into a single source file (*.ino) but in order to make it easy to understand and reuse it has been divided into 5 sections.
- External Libraries
- Internet Connectivity (WiFi)
- Read Sensor Data
- Carriots (Publish) - you will need to get your Apikey and Device ID from Carriots dashboard
- Standard Functions
[code lang="js"]
/***************************************************************************
* External Libraries
**************************************************************************/
#include <Process.h>
#include <YunClient.h>
#include <dht11.h>
/***************************************************************************
* Internet Connectivity Setup - Variables & Functions
**************************************************************************/
// Yun client already connected to the internet
YunClient client;
void printConnectionInformation()
{
// Initialize a new process
Process wifiCheck;
// Run Command
wifiCheck.runShellCommand("/usr/bin/pretty-wifi-info.lua");
// Print Connection Information
while (wifiCheck.available() > 0)
{
char c = wifiCheck.read();
Serial.print(c);
}
Serial.println("-----------------------------------------------");
Serial.println("");
}
/*****************************************************************************
* Sensor Setup - Variables & Functions
****************************************************************************/
dht11 DHT11;
#define DHT11PIN 3
float tempC = 0.0;
void readSensorData()
{
int chk = DHT11.read(DHT11PIN);
Serial.print("[INFO] DHT11 Read: ");
switch (chk)
{
case DHTLIB_OK:
Serial.println("OK");
tempC = (float)DHT11.temperature;
Serial.print(" Temperature (*C): ");
Serial.println(tempC, 2);
break;
case DHTLIB_ERROR_CHECKSUM:
Serial.println("Checksum Error");
break;
case DHTLIB_ERROR_TIMEOUT:
Serial.println("Time Out Error");
break;
default:
Serial.println("Unknown Error");
break;
}
}
/***************************************************************************
* Data Publish - Variables & Functions
**************************************************************************/
#define APIKEY "TO BE REPLACED with your Carriots APIKEY"
#define DEVICE "TO BE REPLACED with your Device's ID developer"
// Set up net client info
const unsigned long postingInterval = 10000; //delay between updates to Carriots
unsigned long lastRequest = 0; // when you last made a request
String dataString = "";
void transmitSensorData()
{
// Form the string for the APIKEY header parameter
String apiString = "carriots.apikey: ";
apiString += APIKEY;
// Convert the readings to a String to send it
dataString = "{"protocol":"v1","checksum":"","device":"";
dataString += DEVICE;
dataString += "","at":"now","data":{"temperature":";
dataString += tempC;
dataString += "}}";
Serial.println("[INFO] Data String:" + dataString);
// Send the HTTP POST request
Serial.println("[INFO] HTTP GET Started");
Process carriots;
carriots.begin("curl");
carriots.addParameter("-k");
carriots.addParameter("--request");
carriots.addParameter("POST");
carriots.addParameter("--data");
carriots.addParameter(dataString);
carriots.addParameter("--header");
carriots.addParameter(apiString);
carriots.addParameter("https://api.carriots.com/streams/");
carriots.run();
Serial.println("[INFO] HTTP GET Completed");
// If there's incoming data from the net connection, print it on Serial
while (carriots.available() > 0)
{
char c = carriots.read();
Serial.write(c);
}
}
/***************************************************************************
* Standard Arduino Functions - setup(), loop()
**************************************************************************/
void setup()
{
// Initialize serial port
Serial.begin(9600);
// Do nothing until serial monitor is opened
while (!Serial);
// Contact the Linux processor
Bridge.begin();
// Print connection information
printConnectionInformation();
lastRequest = millis();
}
void loop()
{
// Get a timestamp to calculate reading and sending intervals
long now = millis();
// If the sending interval has passed since last connection,
// then connect again and send data
if (now - lastRequest >= postingInterval)
{
// Read sensor data
readSensorData();
// Transmit sensor data
transmitSensorData();
lastRequest = now;
}
// Delay
delay(1000);
}
[/code]
Final Product
Make sure your Arduino is powered on and Carriots publish code has been deployed. As soon as the code has been deployed, open serial monitor. As shown in the figure below Arduino will start displaying data being published to Carriots IoT.

Once few readings have been published to the platform, go back to Carriots dashboard, and from the menu click on Data > Data Streams.

This will take you to Data Streams List and all the readings published by Arduino so far will show up here.

Carriots provides a very simple way to generate graphs using the sensor data. From the menu, click on Data > Graphs Widget this will open Graphs Wizard. Select your Device, and click on Next Step.

On Step 2 of the wizard select data that you want to display (in this case it will be temperature). Click on Next Step.

On Step 3 of the wizard select graph type that you want to display. Click on Next Step.

One Step 4, the wizard will show a summary, with a code snippet that you can use in your web apps to display data directly from Carriots.

Step 4 of the wizard will also show how the graph will look like.

Next Steps
You can try changing code to publish data for other IoT sensors as well. You can find the code for reading data for various other sensors here. Share with us the application that you built!