
IoT Sensors - #1: DHT11 (Temperature & Humidity)
This article is the first in a series on Internet of Things (IoT) sensors. It teaches you about various sensors available and how to read data from them.
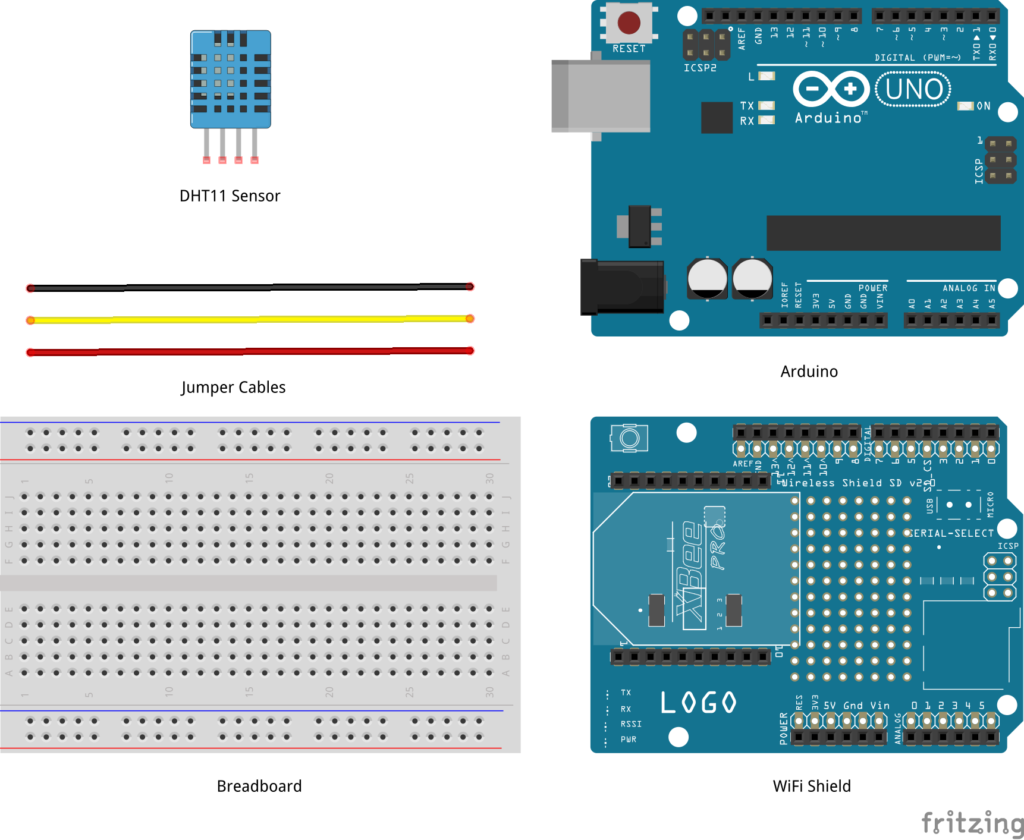
Hardware
- Arduino Uno
- DHT11 (Humidity + Temperature Sensor)
- Jumper Cables

Software
Circuit
Step 1: Make sure your Arduino is not connected to a power source.
Step 2: Using jumper cables connect power (VNC) and ground (GND) ports on Arduino to power (+) and ground (-) ports on the breadboard.
Tip: It is a good practice to use red jumper cable for power (+ / VNC) and black jumper cable for ground (- / GND).
Step 3: Now that your breadboard has a power source, using jumper cables connect power (+) and ground (-) ports of your breadboard to power and ground ports of the DHT11 sensor.
Step 4: To read temperature and humidity values, you will need to connect a jumper cable from signal port of DHT11 sensor to D3 (Digital) port of your Arduino.
Your circuit is now complete and it should look similar to figures below.

Arduino Code
Next, you are going to write Arduino code that will read sensor data. Start your Arduino IDE and either type the code provided below or download it from GitHub. All the code goes into a single source file (*.ino) but in order to make it easy to understand and reuse, it has been divided into 3 sections.
- External Libraries: includes all libraries required to run the program
- <dht11.h> - http://playground.arduino.cc/main/DHT11Lib
- Sensor Setup: code for reading sensor data
- Standard Arduino Functions: implementation of standard Arduino functions setup() and loop()
[code lang="js"]
/***************************************************************************
* External Libraries
**************************************************************************/
#include <SPI.h>;
#include <dht11.h>;
/*****************************************************************************
* Sensor Setup - Variables & Functions
****************************************************************************/
dht11 DHT11;
#define DHT11PIN 3
float humidity = 0.0;
float tempC = 0.0;
void readSensorData()
{
int chk = DHT11.read(DHT11PIN);
Serial.print("[INFO] DHT11 Read: ");
switch (chk)
{
case DHTLIB_OK:
Serial.println("OK");
humidity = (float)DHT11.humidity;
tempC = (float)DHT11.temperature;
Serial.print("[INFO] Humidity (%): ");
Serial.print(humidity, 2);
Serial.print(" Temperature (*C): ");
Serial.println(tempC, 2);
break;
case DHTLIB_ERROR_CHECKSUM:
Serial.println("Checksum Error");
break;
case DHTLIB_ERROR_TIMEOUT:
Serial.println("Time Out Error");
break;
default:
Serial.println("Unknown Error");
break;
}
}
/***************************************************************************
* Standard Arduino Functions - setup(), loop()
**************************************************************************/
void setup()
{
// Initialize serial port
Serial.begin(9600);
}
void loop()
{
readSensorData();
delay(5000);
}
[/code]
Final Product
Make sure your Arduino is powered on and code from above has been deployed. As soon as the code has been deployed, open serial monitor.

Getting Started with IBM® IoTF - #4: Web App
Part 4 of this series on IBM® Internet of Things Foundation (IoTF) teaches you how to create a web app that loads data from the database and displays it in graphical format.
In this tutorial you are going to develop a PHP-based web app that loads data from Cloudant NoSQL DB and displays it in a DOJO chart that you developed in part 1 of this series.

Learning Objectives
At the end of this tutorial you will be able to:
- Create a PHP web app
- Load data from Cloudant NoSQL DB
- Display data in a DOJO chart
IBM IoTF Setup
Login to Bluemix, you will be redirected to the Dashboard.
To create a new web app, from Dashboard click on Create App.

Since you are developing a web app, select Web.

Select PHP as the runtime i.e. your web app will be coded in PHP. Click Continue.

Enter web App Name as Weather-Monitoring-WebApp (this should be unique across Bluemix). Click Finish.

Bluemix will create a new web app and provide its URL.
![]()
Go to Overview of Weather-Monitoring-WebApp. Next, you will need to bind the Cloudant service that was created in part 1 and then configured in part 3. Click on + BIND A SERVICE OR API.
Note: If you add a new Cloudant service then your web app will not have access to the device data that has been stored.

From the list of services provided, select the cloudantNoSQLDB service. Click Add.

Since a new service has been added/bounded to your web app, so Bluemix will need to restage the application.

Once restaging is complete, you will see the cloudantNoSQLDB service in web app Overview. Now that the database is connected, you need to create a PHP page that will load and display device data in a chart.
Note: You have three options for coding, use Eclipse, CLI or DevOps. With Eclipse and CLI you need to setup the code on your machine and then upload it to Bluemix, while IBM® DevOps provides you the necessary tools in the cloud to code, track, build and deploy from a single location without having to worry about any of the environment details. This tutorial uses DevOps.
Click on Add Git button to add/create a new code repository for your app.

If you have not already signed up for DevOps then you will first be required to sign up for an account. Enter a unique alias for your account. Review and if you agree then accept the Terms of Use. Click Create.

Your account has been created, click Continue.

Now that your DevOps account has been created and linked to your IBM ID, you will be taken back to Git repository creation screen. You can tell DevOps if you want it to populate the repo with starter code and enable default deployment method or not. Click Continue.

Your Git repository is ready, click Close.

From Dashboard > Weather-Monitoring-WebApp > Overview, click on the web app URL and if you selected to populate Git repository with starter app package then you should see a Hello world! page displayed.

From Dashboard > Weather-Monitoring-WebApp > Overview, click on Edit Code button to open the code.

Select index.php from the tree to load the code.

Replace the default code with the one provided below. The code performs following functions.
- Loads Cloudant database information from Environment Variables > VCAP_SERVICES (see screenshot after the code)
- Connects to Cloudant database using SAG (a CouchDB client API)
- Creates and displays a DOJO chart with two series, one for temperature and the other for humidity
[code lang="PHP"]
<html lang="en">
<head>
<title>Weather Monitoring Dashboard</title>
<script src="//ajax.googleapis.com/ajax/libs/dojo/1.10.4/dojo/dojo.js" data-dojo-config="async: true"></script>
<script>
<?php require('vendor/autoload.php'); $services_json = json_decode(getenv('VCAP_SERVICES'),true); $VcapSvs = $services_json["cloudantNoSQLDB"][0]["credentials"]; $username = $VcapSvs["username"]; $password = $VcapSvs["password"]; try { $sag = new Sag($username . ".cloudant.com"); $sag->login($username, $password);
$sag->setDatabase("weather-db");
$currentRow = 0;
echo "var humidityData = [";
$resultCount = $sag->getAllDocs()->body->total_rows;
foreach($sag->getAllDocs()->body->rows as $row)
{
$currentRow = $currentRow + 1;
$id = $row->id;
$value = $sag->get($id)->body->d->humidity;
echo $value;
if($currentRow < $resultCount) { echo ","; } } echo "];"; $currentRow = 0; echo "var tempData = ["; $resultCount = $sag->getAllDocs()->body->total_rows;
foreach($sag->getAllDocs()->body->rows as $row)
{
$currentRow = $currentRow + 1;
$id = $row->id;
$value = $sag->get($id)->body->d->tempC;
echo $value;
if($currentRow < $resultCount) { echo ","; } } echo "];"; } catch(Exception $e) { echo ' [INFO] There was an error getting data from Cloudant '; echo $e->getMessage();
}
?>
require([
// Basic Chart Class
"dojox/charting/Chart",
// Orange Theme
"dojox/charting/themes/PlotKit/orange",
// Plot Lines
"dojox/charting/plot2d/Lines",
// Load Legend, Tooltip, and Magnify classes
"dojox/charting/widget/Legend",
"dojox/charting/action2d/Tooltip",
"dojox/charting/action2d/Magnify",
// Markers
"dojox/charting/plot2d/Markers",
// Default x/y Axes
"dojox/charting/axis2d/Default",
// Wait for DOM to be ready
"dojo/domReady!"
], function(Chart, theme, LinesPlot, Legend, Tooltip, Magnify)
{
// Create chart within it's "holding" node
var chart = new Chart("chartNode");
// Set the theme
chart.setTheme(theme);
// Add the only/default plot
chart.addPlot("default", {
type: LinesPlot,
markers: true,
labels: true,
labelStyle: "outside"
});
// Add axes
chart.addAxis("x");
chart.addAxis("y", { min: -50, max: 270, vertical: true, fixLower: "major", fixUpper: "major" });
// Add the series of data
chart.addSeries("Humidity", humidityData);
chart.addSeries("Temperature (C)", tempData);
// Create the tooltip
var tip = new Tooltip(chart,"default");
// Create the magnifier
var mag = new Magnify(chart,"default");
// Render the chart
chart.render();
// Create the legend
var legend = new Legend({ chart: chart }, "legend");
});
</script>
</head>
<body style="background-color: #F5EEE6">
<div style="align: center;"><font size="5px">Weather Monitoring Dashboard</font></div>
<div id="chartNode" style="width:800px;height:400px;"></div>
<div id="legend"></div>
<script type="text/javascript">
init();
</script>
</body>
</html>
[/code]
As mentioned earlier, the code uses SAG API to connect with Cloudant. You need to add the following dependency in composer.json otherwise the code will not work.
[code]
{
"require":
{
"sag/sag":"dev-master"
}
}
[/code]
Environment variables for the application can be viewed from Dashboard > Weather-Monitoring-WebApp > Environment Variables.

DevOps automatically saves all the progress, but it does not deploy it. So, you will need to commit the code changes to Git repository first. Add a comment, select all files and then click Commit.

Your code is still not deployed. You need to Push these changes to the build.

Switch to Build & Deploy screen. As soon as you push the code, a new build will be created and then deployed to the server.
Note: During Deploy stage, your application will not be accessible.

Once both Build and Deploy stages have passed, your application with latest code changes is available.

Click on the URL from Dashboard > Weather-Monitoring-WebApp > Overview section to open your web app, you should see a web page similar to the one below.

Getting started with IBM® IoTF - #3: Data Storage
Part 3 of this series on IBM® Internet of Things Foundation (IoTF) teaches you how to store events published by a device in Cloudant NoSQL database.
In this tutorial, you are going to create a Node-RED flow that will receive and store event data generated by the IoT application you developed in part 1 of this series.

Learning Objectives
At the end of this tutorial you will be able to:
- Create a new database in Cloudant NoSQL DB
- Create a Node-RED flow to receive MQTT events
- Use Node-RED flow to save events in the database
IBM IoTF Setup
Login to Bluemix, you will be redirected to the Dashboard.
Open your IoTF application (WeatherMonitoringSystem) that was developed in part 1. If you look at services included in your application, you will notice that Cloudant NoSQL DB was already added. All IoT applications created using the IoTF boilerplate by default include Cloudant NoSQL DB.

First, you need to create a new database in Cloudant NoSQL DB that will be used to store data. Under Services, click on Cloudant NoDQL DB.

Click on Launch button to open Cloudant NoSQL DB dashboard.

Click on Create Database to create a new database. Enter weather-db and click Create.

The newly created database is now visible on Cloudant dashboard.

Switch back to Bluemix dashboard and click the URL on top to open Node-RED instance of your IoT application.

Click on Go to your Node-RED flow editor to open Node-RED editor.

By default there will be a flow in the editor, you can leave Sheet 1 as-is or delete it. Click on + from top-right to create a new flow sheet.

Double click flow name (sheet name), enter WeatherDBStorageFlow and click Ok.

From input section drag and drop ibmiot node.

At this point, your flow should look as follows.

Double click ibmiot node to set properties as shown in the figure below.

Change Authentication from Quickstart to Bluemix Service. Leave Input Type as Device Event. For Device Type, Device Id and Event select All (you can provide specific information as well). Set Format as json, since that is the format device is using to publish data. Click Ok.

From storage section drag and drop cloudant node.

Double click the cloudant node to set properties as shown in the figure below. Since your IoT app already has a Cloudant NoSQL DB service added, so you do not need to manually enter credentials, simply select your Cloudant NoSQL DB service from the Service drop-down. Enter weather-db in Database field, this is the same name you used while creating a new database in Cloudant. Select insert from Operation. Click Ok.

Connect ibmiot and cloudant nodes.

Click Deploy to make data storage flow available.
Final Product
Make sure your Arduino is powered on and code from part 1 has been deployed. As soon as the code has been deployed, open serial monitor and you will start seeing data publish messages.

Launch Cloudant NoSQL DB dashboard and open your database (weather-db). The All Documents link will list all the JSON documents with humidity and temperature data that have been stored so far.

Click on any of the documents to see details.

Getting started with IBM® IoTF - #2: Data Visualization
Part 2 of this series on IBM® Internet of Things Foundation (IoTF) teaches you how to visualize published data using IBM® IoT Real-Time Insights service.

In this tutorial, you are going to create a real-time dashboard to visualize IoT application data that you developed in part 1 of this series.
Learning Objectives
At the end of this tutorial you will be able to:
- Add IoT Real-Time Insights service to your Bluemix app
- Connect IoTF service as a data source for IoT Real-Time Insights service
- Create a dashboard using IoT Real-Time Insights service
IBM IoTF Setup
Login to Bluemix, you will be redirected to the Dashboard.
Open your IoTF application (WeatherMonitoringSystem) and click on + ADD A SERVICE OR API.

In Catalog, select Internet of Things > IoT Real-Time Insights service.

On service properties screen leave Service name and default Plan as-is or provide your own values. Click Create button.

In order to add this new service to your app, Bluemix will need to restage the application. Once prompted click Restage button.

Once restaging is complete, click on IoT Real-Time Insights service in your application.

Service details page will open with options to Add a data source, Go to DOCS and Launch IoT Real-Time Insights Dashboard. For insights service to work, you will first need to add a new data source. Click on Add a data source button.

You might be asked to sign in again with your IBM ID.

Once you are on IoT Real-Time Insights dashboard under Setup > Manage Data Sources tab, click Add New Data Source button.

Enter Name, Organization ID, API Key and Authentication Token.
Note: You will be able to locate Organization ID, API Key and Authentication Token from your IoTF dashboard.

From Bluemix Dashboard launch IoTF Dashboard.

From IoTF Dashboard click on Access > API Key tab.

Click on Generate API Key.

Switch back to IoT Real-Time Insights dashboard and enter API Key and Authentication Token from the previous step.

Click tick to save Data Source.

From Devices > Browse Devices, you should see the devices that you registered with IoTF. Currently, it might show No data point defined.
Go to Devices > Manage Schemas and click Add new message schema.

Click on + Link data source, a link new data Source dialog box will open.

Click on magnifying glass to search existing data sources.

Select the WeatherDS datasource that you created earlier.

Next, select Device Type as WeatherDT and leave Event as + (to capture all events being published by the device). Click Ok to complete data source addition.

Next, you need to add data points in the schema, these data points will be used for all visualizations (data points are objects/fields being sent as part of JSON message). Click on + Add data point to open Add Data Points dialog box.

If your IoT app from part 1 is running and publishing data to IoTF then select Add from connected device. The system will automatically load data points being sent by the device.

Select the data points you might want to see on the dashboard and click Ok.

Both your data source and data points have been added, enter Message Schema name and click Ok.

Note: To plot a chart on the dashboard you will need to change the data type of both humidity and tempC from String to Float. This can be done by clicking on pencil/edit icon on the previous screen.

Once data points have been added you will see the newly added Message schema.

Switch to Dashboards > Overview to view the default dashboard.

You are going to create your own dashboards. Switch to Dashboards > Browse Dashboards and click on + Add new dashboard.

Enter Dashboard name, you can change icons and a few other properties. Click the tick to add the dashboard.

Click on newly created dashboard Weather Realtime Dashboard.

Click on Add new component.

Select Chart.

Click on Add line to chart. Select Device, Parameter, and Color. Click on tick button.

Add both humidity and tempC data points as lines in the chart.

You can add other available components as well, but for the purposes of this tutorial only real-time chart component has been added.

Final Product
Make sure your Arduino is powered on and code from part 1 has been deployed. As soon as the code has been deployed, open serial monitor and you will start seeing data publish messages.
Login to IoT Real-Time Insights dashboard and open your custom dashboard. The chart will start displaying all the sensor readings in real time.


What is Digital Transformation?
Digital transformation is the latest buzz word being used by all the consulting companies and organizations, but what is it? One of the more comprehensive definitions that I have found is from i-scoop.eu.
Digital transformation is the profound and accelerating transformation of business activities, processes, competencies and models to fully leverage the changes and opportunities of digital technologies and their impact across society in a strategic and prioritized way.
Source: i-scoop.eu
Another simpler definition of digital transformation can be found from Wikipedia.
Digital transformation is the changes associated with the application of digital technology in all aspects of human society.
Source: Wikipedia
In my opinion, digital transformation is not just about technology. The digital part, of course, can only be achieved using technology, but transformation requires vision, strong leadership and strategy.
A research report from MIT Sloan Management Review identifies three key areas that organizations can focus on for digital transformation.
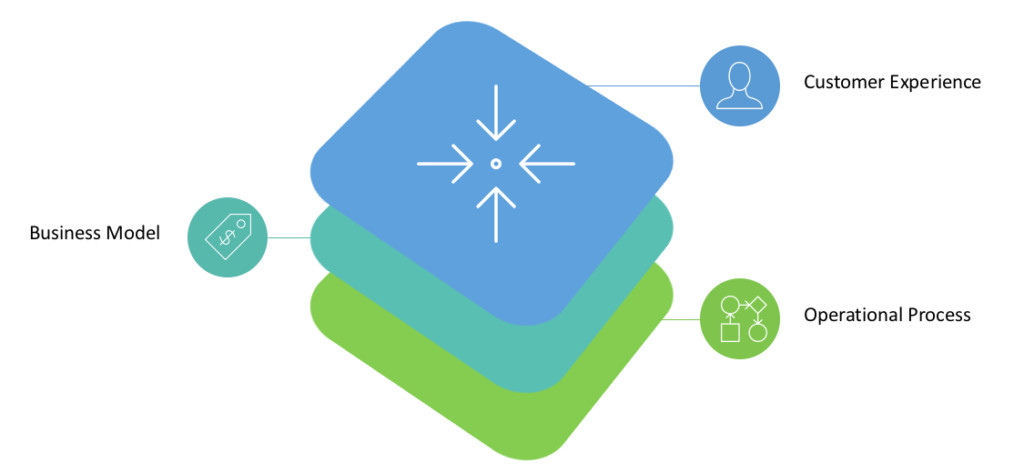
For each area, the report also provides three elements that are changing.
- Customer Experience
- Customer Understanding
- Top-line Growth
- Customer Touch Points
- Operational Process
- Process Digitization
- Worker Enablement
- Performance Management
- Business Model
- Digitally Modified Business
- New Digital Businesses
- Digital Globalization
These elements provide a good starting point for organizations looking to digitally transform. Of course focusing on all of them at once might be overwhelming, so each organization will need to prioritize what elements to focus on based on their goals.
Getting Started with IBM® IoTF - #1: Data Publish
This article is the first in a series on IBM® Internet of Things Foundation (IoTF). It teaches you how to develop an Internet of Things (IoT) application in IBM® Bluemix.
In this tutorial, you are going to develop a simple Weather Monitoring IoT application. As the figure below shows, this IoT application will sense temperature and humidity data and publish it to IoTF using the MQTT protocol.
Learning Objectives
At the end of this tutorial you will be able to:
- Design an IoT device that senses temperature and humidity
- Create an IoT application and add services in Bluemix
- Setup device type and devices in IoTF
- Write code to publish device data to IoTF
- View device data in IoTF
Hardware
Note: If the model of Arduino that you are using comes with built-in WiFi capabilities then you do not need a separate WiFi Shield.
- Arduino Uno
- Arduino WiFi Shield
- DHT11 (Humidity + Temperature Sensor)
- Jumper Cables
 Software
Circuit
Step 1: Make sure your Arduino is not connected to a power source.
Note: If the model of Arduino that you are using comes with built-in WiFi capabilities then you do not need a separate WiFi Shield and can skip this step.
Step 2: Attach WiFi Shield or Ethernet Shield on top of Arduino.
Step 3: Using jumper cables connect power (VNC) and ground (GND) ports on Arduino to power (+) and ground (-) ports on the breadboard.
Tip: It is a good practice to use red jumper cable for power (+ / VNC) and black jumper cable for ground (- / GND).
Step 4: Now that your breadboard has a power source, using jumper cables connect power (+) and ground (-) ports of your breadboard to power and ground ports of the DHT11 sensor.
Step 5: To read temperature and humidity values, you will need to connect a jumper cable from signal port of DHT11 sensor to D3 (Digital) port of your Arduino.
Your circuit is now complete and it should look similar to figures below.
 IBM IoTF Setup
Signup for Bluemix.
Login to Bluemix, you will be redirected to the Dashboard.
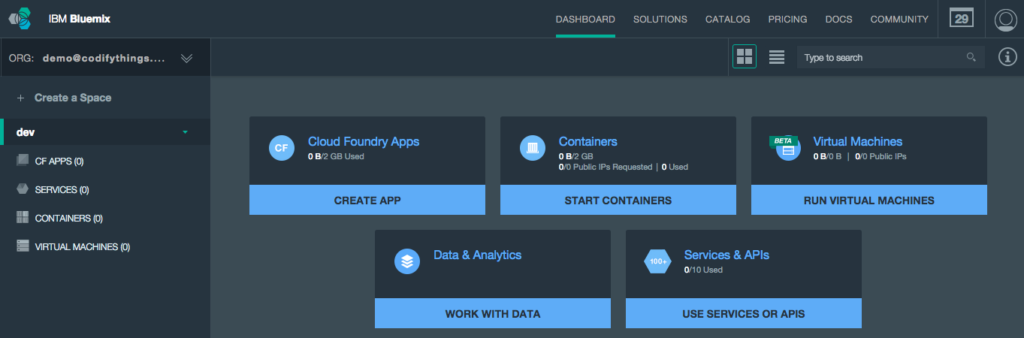 Select Catalog from the top menu.
![]()
Select Internet of Things Foundation Starter from Starters > Boilerplates.

Enter WeatherMonitoringSystem in the Name field (application name has to be unique across Bluemix). Click Create button.
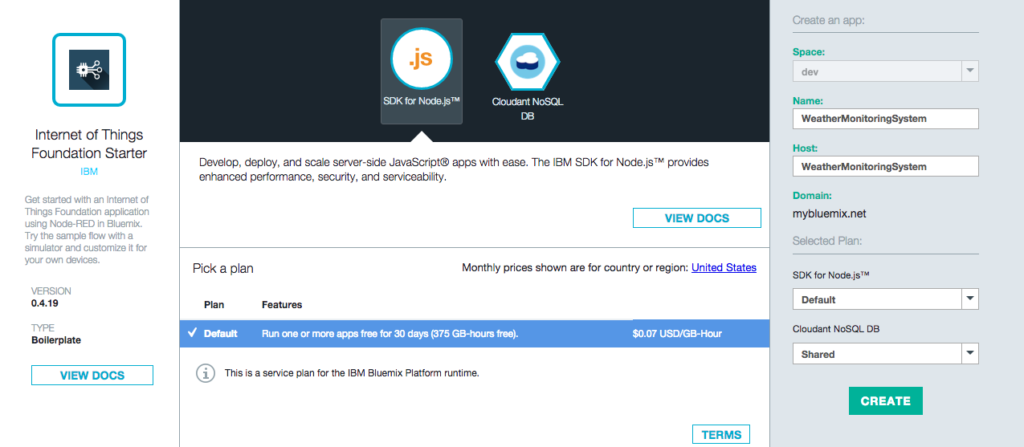
Bluemix will take some time to create your application. Once your application is ready it will be available at http://.mybluemix.net URL (in the case of this tutorial it will be http://WeatherMonitoringSystem.mybluemix.net).

To check if your application is running click on the link provided above. If an instance of Node-RED opens then your application was created as expected.
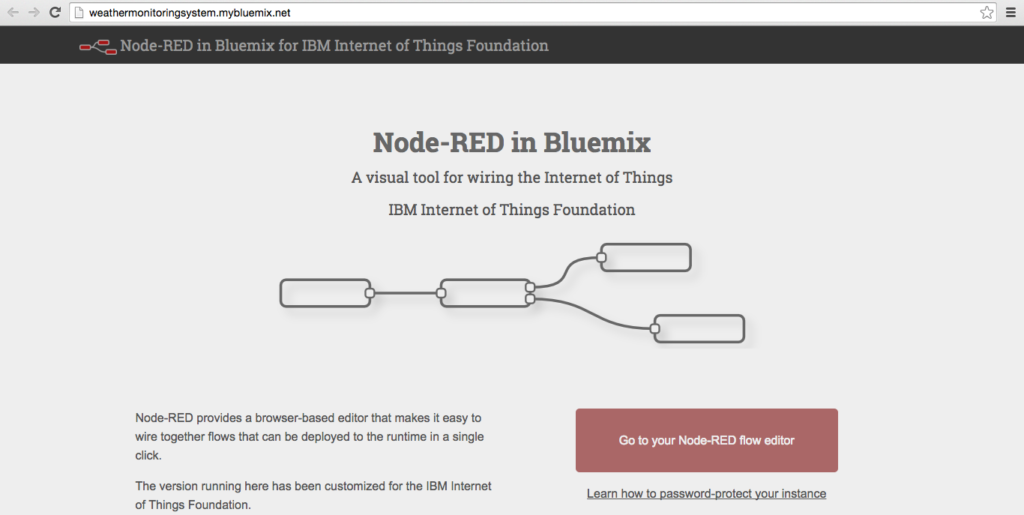
Application created using IoTF boilerplate uses Node.js as the runtime and by default includes a Cloudant NOSQL DB service and a Node-RED flow (this service will be used in upcoming tutorials).
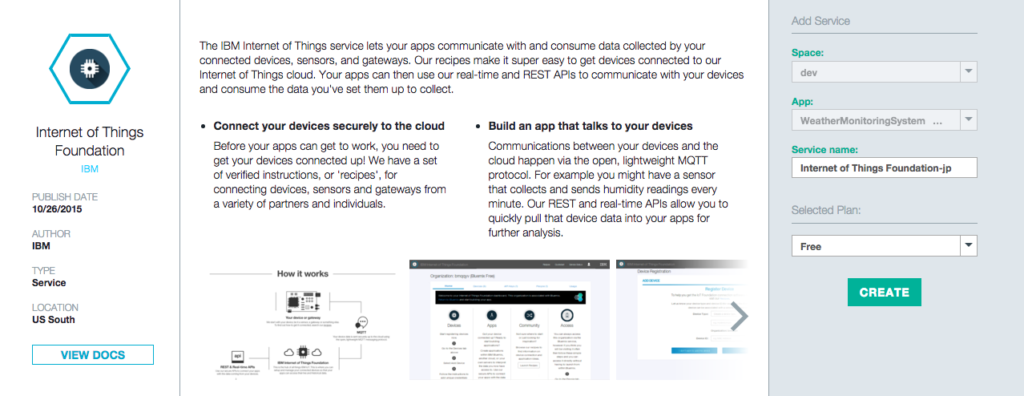
To register your devices with IoTF you need to add Internet of Things Foundation service to the app. From Dashboard open WeatherMonitoringSystem application, and click on + ADD A SERVICE OR API button. You will be redirected to Catalog. Under Services select Internet of Things and click on Internet of Things Foundation service.

On service properties screen, leave Service name and default plan Free as-is or change according to your requirements. Click on Create button. Bluemix will add this service to your app.
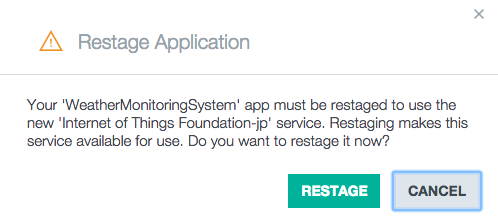
Bluemix will need to re-stage your application before it can be added to the app.
Once the previous step is complete, on your Dashboard you will be able to see newly added IoTF service in WeatherMonitoringSystem application. From Dashboard under Services section click on IoTF service to open details screen.

The service details screen provides you options to Launch dashboard, Go to docs and Find out how. Click on Launch dashboard to open IoTF dashboard.
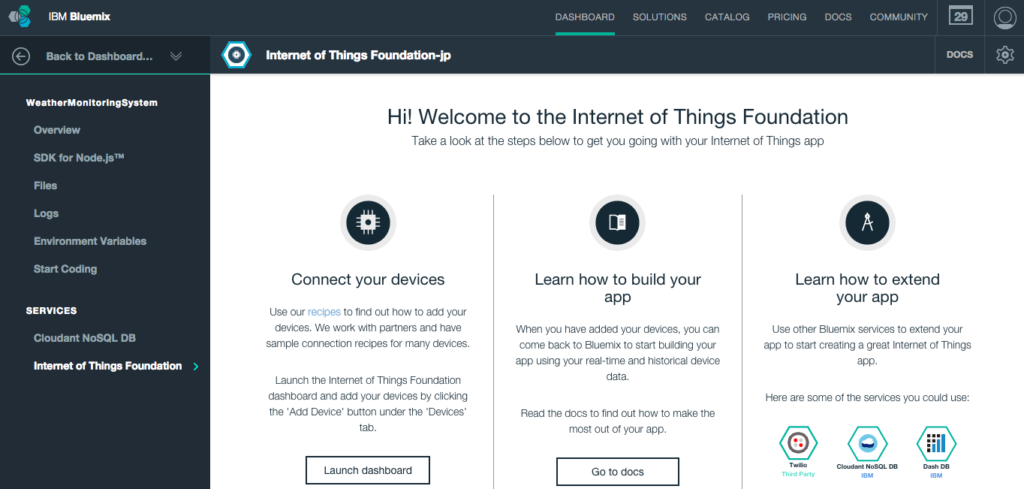
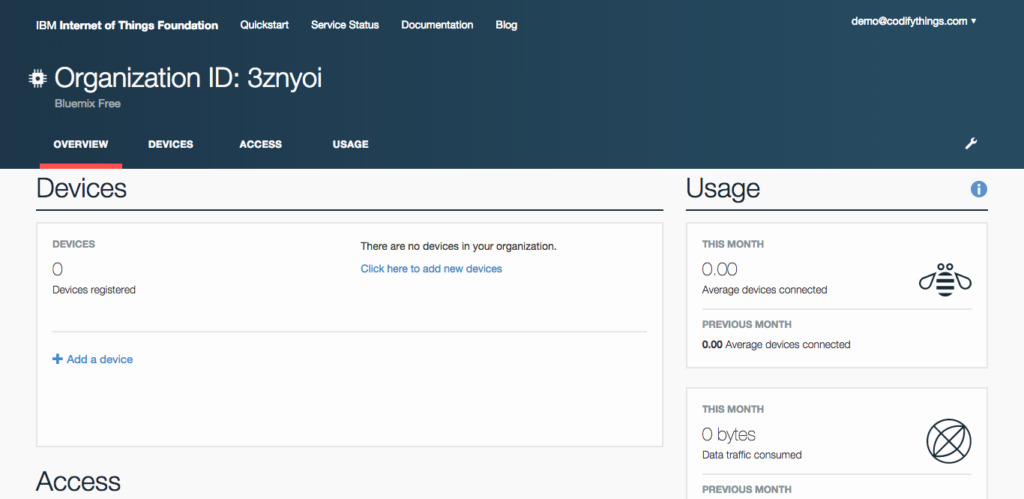
Overview tab provides you quick information about your Devices, Access, and Usage. Your device needs to be registered before it can start sending events to IoTF. Click on + Add a device link under Devices section.
If you have added devices previously then you can choose an existing Device Type otherwise you will need to create a new Device Type. Click on Create device type button.
Note: Device Type can be considered a template for devices i.e. all devices belonging to same Device Type will be initialized with same attributes.
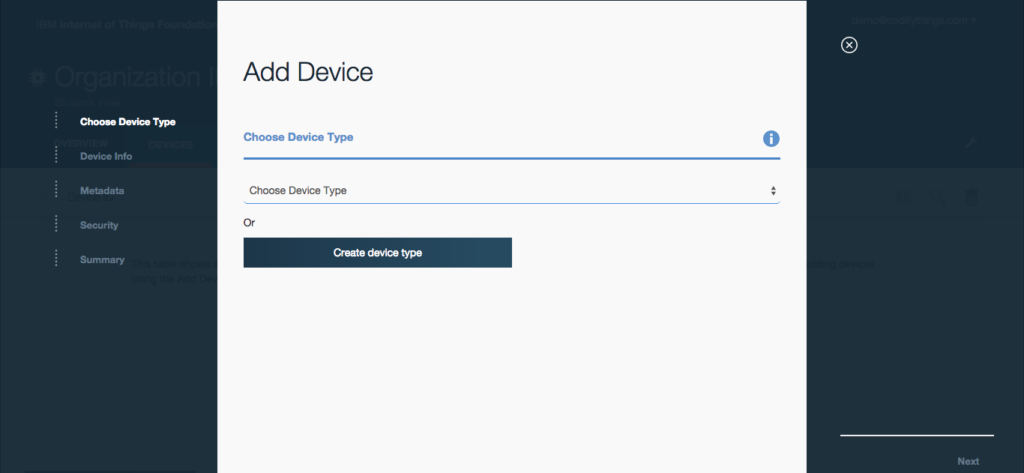
Select Create device type.
Enter Name and Description of the Device Type. Click Next to proceed.
Note: Later on in Arduino code, you will need to use this Name and depending on your version of MQTT client library that you are using to publish sensor data there might be a length limit, so check your client library for client name length limit.
Select Description from attributes list. Click on Next button.

Whichever Attribute you chose, on Submit Information screen you will need to provide values for them. Click Next.

Click Create button to complete Device Type setup.

You will be taken back to Add Device screen. Make sure you have selected the newly created Device Type from the list of values. Click Next.

On Device Info screen enter unique Device ID, and if you see Description is pre-filled with information that you entered while creating a new Device Type. Click Next.

Leave Metadata screen empty and click Next.

On Security screen, you have the option to either auto-generate a token or provide your own token. Leave Provide a token (optional) field empty and click Next button, this will make sure that a token is auto-generated.

Review your Device information on Summary screen and click Add button.

On next screen, the system will display auto-generated device token, make sure you copy and save the token as it will not be displayed again.

Your device setup is now complete and will be visible on the dashboard.

Arduino Code
IoTF is ready to receive events. Next, you are going to write Arduino code that will sense and publish events. Start your Arduino IDE and either type the code provided below or download it from GitHub. All the code goes into a single source file (*.ino) but in order to make it easy to understand and reuse, it has been divided into 5 sections.
- External Libraries: includes all libraries required to run the program
- - https://github.com/arduino/Arduino/tree/master/libraries/Ethernet
- - https://github.com/arduino/Arduino/tree/master/libraries/WiFi
- - http://playground.arduino.cc/main/DHT11Lib
- - https://github.com/knolleary/pubsubclient/releases/tag/v2.3
- Internet Connectivity Setup: code for WiFi connectivity, you simply need to replace
[code lang="js"]
char ssid[] = "&amp;lt;SSID_HERE&amp;gt;";
char pass[] = "&amp;lt;PASSWORD_HERE&amp;gt;";
[/code]
- Sensor Setup: code for reading sensor data
- Data Publish: code for publishing sensor data to IoTF, make sure to provide custom values in following fields
[code lang="js"]
char server[] = "&amp;lt;Organization_ID_HERE&amp;gt;.messaging.internetofthings.ibmcloud.com";
int port = 1883;
char topic[] = "iot-2/evt/&amp;lt;EVENT_NAME&amp;gt;/fmt/&amp;lt;EVENT_FORMAT&amp;gt;";
String clientName = String("d:&amp;lt;Organization_ID_HERE&amp;gt;:&amp;lt;Device_Type_HERE&amp;gt;:&amp;lt;Device_ID_HERE&amp;gt;");
char token[] = "&amp;lt;DEVICE_TOKEN&amp;gt;";
[/code]
- Standard Arduino Functions: implementation of standard Arduino functions setup() and loop()
[code lang="js"]
/***************************************************************************
* External Libraries
**************************************************************************/
#include &amp;lt;SPI.h&amp;gt;
#include &amp;lt;WiFi.h&amp;gt;
#include &amp;lt;dht11.h&amp;gt;
#include &amp;lt;PubSubClient.h&amp;gt;
/***************************************************************************
* Internet Connectivity Setup - Variables &amp;amp; Functions
**************************************************************************/
char ssid[] = "&amp;lt;SSID_HERE&amp;gt;"; // Network SSID (name)
char pass[] = "&amp;lt;PASSWORD_HERE&amp;gt;"; // Network Password (use for WPA,
// or use as key for WEP)
int keyIndex = 0; // Network Key Index Number
// (needed only for WEP)
int status = WL_IDLE_STATUS;
WiFiClient client;
void connectToInternet()
{
status = WiFi.status();
// Check for the presence of the shield
if (status == WL_NO_SHIELD)
{
Serial.println("[ERROR] WiFi Shield Not Present");
// Do nothing
while (true);
}
// Attempt to connect to WPA/WPA2 Wifi network
while ( status != WL_CONNECTED)
{
Serial.print("[INFO] Attempting Connection - WPA SSID: ");
Serial.println(ssid);
status = WiFi.begin(ssid, pass);
}
// Connection successful
Serial.print("[INFO] Connection Successful");
Serial.print("");
printConnectionInformation();
Serial.println("-----------------------------------------------");
Serial.println("");
}
void printConnectionInformation()
{
// Print Network SSID
Serial.print("[INFO] SSID: ");
Serial.println(WiFi.SSID());
// Print Router's MAC address
byte bssid[6];
WiFi.BSSID(bssid);
Serial.print("[INFO] BSSID: ");
Serial.print(bssid[5], HEX);
Serial.print(":");
Serial.print(bssid[4], HEX);
Serial.print(":");
Serial.print(bssid[3], HEX);
Serial.print(":");
Serial.print(bssid[2], HEX);
Serial.print(":");
Serial.print(bssid[1], HEX);
Serial.print(":");
Serial.println(bssid[0], HEX);
// Print received signal strength
long rssi = WiFi.RSSI();
Serial.print("[INFO] Signal Strength (RSSI): ");
Serial.println(rssi);
// Print encryption type
byte encryption = WiFi.encryptionType();
Serial.print("[INFO] Encryption Type: ");
Serial.println(encryption, HEX);
// Print WiFi Shield's IP address
IPAddress ip = WiFi.localIP();
Serial.print("[INFO] IP Address: ");
Serial.println(ip);
// Print MAC address
byte mac[6];
WiFi.macAddress(mac);
Serial.print("[INFO] MAC Address: ");
Serial.print(mac[5], HEX);
Serial.print(":");
Serial.print(mac[4], HEX);
Serial.print(":");
Serial.print(mac[3], HEX);
Serial.print(":");
Serial.print(mac[2], HEX);
Serial.print(":");
Serial.print(mac[1], HEX);
Serial.print(":");
Serial.println(mac[0], HEX);
}
/*****************************************************************************
* Sensor Setup - Variables &amp;amp; Functions
****************************************************************************/
dht11 DHT11;
#define DHT11PIN 3
float humidity = 0.0;
float tempC = 0.0;
void readSensorData()
{
int chk = DHT11.read(DHT11PIN);
Serial.print("[INFO] DHT11 Read: ");
switch (chk)
{
case DHTLIB_OK:
Serial.println("OK");
humidity = (float)DHT11.humidity;
tempC = (float)DHT11.temperature;
Serial.print("[INFO] Humidity (%): ");
Serial.print(humidity, 2);
Serial.print(" Temperature (*C): ");
Serial.println(tempC, 2);
break;
case DHTLIB_ERROR_CHECKSUM:
Serial.println("Checksum Error");
break;
case DHTLIB_ERROR_TIMEOUT:
Serial.println("Time Out Error");
break;
default:
Serial.println("Unknown Error");
break;
}
}
/***************************************************************************
* Data Publish - Variables &amp;amp; Functions
**************************************************************************/
// IP address of the IBM MQTT server
char server[] = "&amp;lt;Organization_ID_HERE&amp;gt;.messaging.internetofthings.ibmcloud.com";
int port = 1883;
char topic[] = "iot-2/evt/&amp;lt;EVENT_NAME&amp;gt;/fmt/&amp;lt;EVENT_FORMAT&amp;gt;";
String clientName = String("d:&amp;lt;Organization_ID_HERE&amp;gt;:&amp;lt;Device_Type_HERE&amp;gt;:&amp;lt;Device_ID_HERE&amp;gt;");
char token[] = "&amp;lt;DEVICE_TOKEN&amp;gt;";
PubSubClient pubSubClient(server, port, 0, client);
void publishData()
{
// Connect MQTT Broker
Serial.println("[INFO] Connecting to MQTT Broker");
char clientStr[60];
clientName.toCharArray(clientStr,60);
if (pubSubClient.connect(clientStr, "use-token-auth", token))
{
Serial.println("[INFO] Connection to MQTT Broker Successfull");
}
else
{
Serial.println("[INFO] Connection to MQTT Broker Failed");
}
// Publish to MQTT Topic
if (pubSubClient.connected())
{
//Read sensor data
readSensorData();
Serial.println("[INFO] Publishing to IBM IoTF");
String data = "{"d": {"humidity": "" + String(humidity) + "", "tempC": "" + String(tempC) + ""}}";
char jsonStr[50];
data.toCharArray(jsonStr,50);
Serial.print("[INFO] JSON Data: ");
Serial.println(jsonStr);
char topicStr[33];
String topicName = topic;
topicName.toCharArray(topicStr,33);
if (pubSubClient.publish(topicStr,jsonStr))
{
Serial.println("[INFO] Data Published Successfully");
}
else
{
Serial.println("[INFO] Failed to Publish Data");
}
Serial.println("[INFO] Disconnecting Server");
pubSubClient.disconnect();
}
Serial.println("[INFO] Publish to MQTT Broker Complete");
Serial.println("-----------------------------------------------");
pubSubClient.loop();
}
/***************************************************************************
* Standard Arduino Functions - setup(), loop()
**************************************************************************/
void setup()
{
// Initialize serial port
Serial.begin(9600);
// Connect Arduino to internet
connectToInternet();
}
void loop()
{
//readSensorData();
publishData();
delay(5000);
}
[/code]
Final Product
Make sure your Arduino is powered on and IoTF publish code has been deployed. As soon as the code has been deployed, open serial monitor.
Log in to IBM IoTF dashboard and open your device, the Recent Events section will list all the events with their JSON message.

Click on any Event to see payload.

Sensor Information section shows the latest value of each data point.
The Connection Log section will provide you information about the status of connection attempts from your device.


Creating Virtual Affinity Maps with IBM® Blueworks Live™
Affinity mapping, also known as affinity diagrams and the K J Method, is a business tool used to organize large amounts of brainstormed ideas into natural relationships. It is a valuable way for analysts to elicit requirements from business users in a collocated setting.
IBM Blueworks Live is a real-time collaboration tool for analysts and business users to discover and document business processes. In this tutorial, you learn how to use Blueworks Live to make affinity mapping collaborative in a virtual environment.
Read the complete article on IBM Business Process Management Journal.

How To Improve Worker Engagement Using Process Gamification
Note: This article was originally published on my previous blog ProcessRamblings.com.
Gamification is the use of game thinking and game mechanics in non-game contexts to engage users in solving problems and increase users’ self-contributions. If implemented in the right manner, gamification can be a great tool for sustained engagement. Laura Lilyquist of Badgeville defines sustained engagement as
“the kind of engagement that naturally occurs over the long term and becomes permanently ingrained into the culture”.
In this article, we are going to discuss what game elements can be used in business processes to improve worker engagement.
Points System
As humans, we seek recognition and acknowledgment for a job well done or for going the extra mile to help the organization. Games use a points-based system and recognize players’ performance in various different ways such as unlocking new levels, giving additional “goodies” and awarding achievement badges.
A similar concept of points-based system can be used to reward process workers as well. Following list provides various activities that can be used to award points.
Challenges – task completion cycle times can be used as challenges for users e.g. different points can be awarded based on the time taken to complete a task.
- Task Completion Time < 1 Day = 3 Points
- Task Completion Time > 1 Day & < 2 Days = 2 Points
- Task Completion Time > 2 Days = 1 Points
Performance – points for initiating or completing a certain number of tasks over a specified period of time e.g. sales lead generation.
Feedback – this is an important one to measure and reward because this would normally lie outside of a workers job duties.
Share Improvement Ideas – providing process improvement feedback to process owner through the system.
Content Feedback – starting a discussion thread about a process feature or anything that could be useful for others working on the process.
Commenting/Answering Questions – participating in discussions by commenting or answering questions.
Reports & Filters – if there are ad-hoc reports, then sharing those reports and possible search criterion could be very beneficial for other users, increases collaboration and avoids reinvention of the wheel.
Rework – nobody likes rework, so just like games reduce points, there should be a negative impact on the user’s score for causing rework. Rework can be calculated based on process loopbacks, data hygiene and data accuracy etc.
Achievement Badges
 Points awarded to users become the basis for recognizing achievements. For instance, a user who consistently resolves 10 cases a day for a period of 30 days can be awarded the Case Guru badge. Badges are usually funny and quirky, something that people will enjoy and can feel proud of when displayed on their profiles.
Similarly, points can also be used to assign relatively simpler tasks to newbie’s as compared to assigning difficult tasks to more experienced users. In games, this can be seen as transitioning from Newbie to more Advanced levels.
Leaderboards
 Leaderboards are perhaps the most popular gamification technique used in non-game contexts. Leaderboards are a motivational tool where users get to compare their scores or performance with peers.
Leaderboards should use a similar scoring mechanism i.e. rank users working in similar process areas ensuring we compare apples to apples and not apples and not apples to oranges.
 Leaderboards bring out the competitive nature in humans and cause “shame” in losing. So, a recommended approach is to use team leaderboards as well, this encourages cooperation and creates a more collaborative environment.
Activity Streams
Live activity streams can be used to display user accomplishments to everyone as and when they happen. Accomplishments can include completion of a task, milestone or earn a badge. Unlike leaderboards which provide cumulative data, activity streams provide more visibility to individual achievements.
Goals
The concept of team games should be used i.e. all players on a team playing for the same goal. The goal should not be winning or obliterating the opponent, instead of in an organization focus should be on creating a more collaborative environment.
In games providing upfront goals such as how many points need to be scored, coins need to be collected or enemies need to be destroyed gives players a clear idea at each moment about what needs to be done in order to complete the level. Similarly, process works should have clear goals e.g. not working on easy cases, instead of working on the case with a higher dollar value and other organizational goals.
Progress
Process workers should continuously know their progress towards achieving their goals, this could be either displaying amount of dollars they have recovered for the organization or what stage are they in the process.
Helpful Hints
Complex and nicely designed games provide on-screen hints and guides which are extremely helpful for new players. Help, hints, and wizards should be included for process workers as well, these will definitely help reduce the training time for new users and of course existing users can always refer to them in case they are stuck for any reason.
Conclusion
 As mentioned in the beginning of this article, if implemented in the right manner gamification can significantly improve process worker’s engagement.
- Gamification should not be forced on the users because that is not any different from the current stick approach. Gamification also should not be a carrot approach i.e. expecting to get more work out of user’s just because they will be rewarded. It should be implemented with user’s consent, both carrot and stick approaches do not work in the longer term.
- Gamification should focus on individuals working to organization’s goals, it should not be used to shame individuals with lower points/score/performance.
- The rewards system should be appropriate according to the nature of job e.g. a sales person closing new leads in time should definitely be called a Sales Guru, but it should not replace their monetary compensation.
References
- 6 Critical Game Mechanics to Consider in Leaderboards (Part 1)
- Employee Engagement Drives Optimal Business Results
- Psychology of High Scores, Leaderboards, & Competition
- Gaming for Reality – Can BPM be Fun?
- Gamifying processes: seductive, but proceed with caution
- OpenClipArt.org

How To Empower Knowledge Workers Using Cognitive BPM
Note: This article was originally published on my previous blog ProcessRamblings.com.
Throughout the lifecycle of a business process knowledge workers are required to make decisions based on their domain knowledge.
IBM® Watson™ is an artificially intelligent computer system with the capability to answer any domain related questions in a natural language.
In this article, we are going to take a look at how different IBM® Watson™ services can be used within business processes to empower knowledge workers in making better decisions.

Personality Insights
Enables deeper understanding of people’s personality characteristics, needs, and values to help engage users on their own terms
Example: This service can be utilized in processes such as New Hire. It can be used to analyze various personality characteristics of a candidate. It analyzes the input text which in our example can be candidates profile, emails or any other communication. The output will be both in natural language and visual formats as shown in diagrams below. This output can help in deciding if the candidate is a good fit for the organization or not.


Concept Insights
Explores information based on the concepts behind your input, rather than limiting investigation to findings based on traditional text matching
Example: Processes such as Talent Acquisition that currently use keyword-based search can tremendously benefit from this service. The traditional keyword-based searches might not always return the desired results because if an exact match is not found the document and in our case, a resource profile will simply be ignored. The Concept Insights service, on the other hand, looks for conceptually related items i.e. even if the input keywords do not exactly match, this service will try to find content that is related to the same concept. In our example, a resource profile might not match the exact keywords, but it will still show up in the search results even if the resource profile has different keywords or they have worked in a related area.

Tradeoff Analytics
Helps users make better choices to best meet multiple conflicting goals, combining smart visualization and recommendations for tradeoff exploration
Examples: Tradeoffs are an integral part of the decision-making process. This service can help recommend the best possible case that meets organizational goals.
This service can be utilized in the supply chain processes for selecting best possible suppliers, sourcing low-cost parts etc. The service provides a very visual way of performing this analysis as shown in the diagram below.

Another great utility is in the patient case management where this service can help decide the best treatment options and drugs for patients.

Similarly, this service can be used in financial asset management processes to make informed decisions about choosing the best assets for investment.
Language Identification / Machine Translation
Identifies the language in which text is written
Globalize on the fly. Translate text from one language to another
Example: These are two distinct services, one that identifies which language is the input text written in, while the second one translates it. For larger organizations that operate globally, this is an essential requirement. This service just makes the whole globalization process easy by automatically translating the text.
Question And Answer
Direct responses to user inquiries fueled by primary document sources
Example: This service provides answers to questions in a natural language thus making it a great source for getting additional domain-specific information. The answers that the service returns also include Watson’s confidence level as a percentage.
The service can be used in all types of processes such as in travel and hospitality processes for finding out visa and vaccination requirements of a country or in the healthcare industry for getting more information about a disease.

Conclusion
In addition to the IBM® Watson™ services mentioned above, there are quite a few other services that are currently available, such as:
- Concept Expansion
- Relationship Extraction
- Message Resonance
- Speech to Text
- Text to Speech
- Visual Recognition
- Visualization Rendering
All of these services are available on IBM® Cloud™, can be easily developed using Bluemix™ and consumed within any Business Process Management (BPM) or Case Management tool. For now, these can be used to support and empower knowledge workers in making decisions but in future, these can and will be used to automate the decision-making process.
References
- IBM® Watson™ Services Catalog – Used for service definitions
- Integrate IBM BPM with IBM Watson, Part 1 by Raj Mehra
- Integrate IBM BPM with IBM Watson, Part 2 by Raj Mehra
Disclaimer: IBM® Watson™, IBM® Cloud™ and Bluemix™ are trademarks or registered trademarks of International Business Machines Corporation.
Republished/Cited
- Article republished on BPTrends.com

How Process Mining Finds Hidden Business Processes
Note: This article was originally published on my previous blog ProcessRamblings.com.
In this article, we are going to discuss what type of gaps are left by existing process analysis techniques, what is process mining and what are the benefits of applying process mining techniques during analysis and how to apply these techniques.
Gaps In Process Analysis Techniques
First, let’s take a look at the cases in which existing process analysis techniques fail and result in process gaps.
The picture on right is taken from the process mining course that is offered by Eindhoven University of Technology. It gives insight into an important human behavior of
Shortcuts.
Shortcuts are very common in our daily lives. As the picture shows there might be a perfectly laid out path in front of us, but most of us will still create our own shortcut through the grass.
The same practices can be seen in our work lives. An organization can have very well defined processes, but workers still find a way to bypass them. These bypasses are usually the most commonly executed flows of the process (a.k.a. Process Highways), yet in most cases remain undocumented.
During process analysis, requirements are usually captured from the following sources:
- Workers/Performers
- Standard Operating Procedures (SOP)
- Process Documentation
- Industry Standards
All these sources provide information on the as-is process i.e. how it has been defined or how the process is supposed to flow. This does not necessarily reflect the reality and as a result, we find gaps between the defined process and the executed process.
Defined versus Executed Process
To further elaborate this gap, consider the example of a simple Expense Claims Process. The first process model shows what is the defined flow of an expense claim request. The assumption is, that 100% of claims after submission go for Manager’s approval. Manager approves or rejects them, and in the case of approval, they move to the Finance team’s queue for reimbursement.

In reality, workers do not follow the defined process. If we were to look at the historical data of the process, we might find that in reality only 30% of claims are sent for Manager’s approvals. 70% of claims are directly sent to Finance team for reimbursement.

We have established that people bypass defined processes and they create their own shortcuts, yet most of the process analysis techniques we use only look at the defined as-is processes and simply ignore these bypasses. So this results in gaps between the defined process and the executed process.
What is Process Mining?
In the expense claims process example what actually helped us in identifying the gap?
Data
This is exactly what process mining techniques do. They allow us to extract real process information from the data. These techniques identify all possible paths of the process from events log and answer following questions:
- How are the cases actually being executed?
- What is the most frequent path for every process model?
- How is the distribution of all cases over the different paths through the process?
- How many people are involved in a case?
All these questions, help us in extracting the process paths that are actually executed in the organization.
How To User Process Mining Tools?
There are a few process mining tools available on the market. One of them is ProM, which is a free tool developed by Eindhoven University of Technology in collaboration with a few other universities and vendors.
At a high-level the usage of ProM is simple.
Step 1 – Retrieve events log of the process that needs to be analyzed. Events log usually has following information that can help identify transactions uniquely and correlate them.
Case ID | Activity Name | Performer | Timestamp
Step 2 – Events log are converted into an XML format that is understood by ProM.
Step 3 – ProM mines the data and generates all possible process paths using the standard BPMN. The generated model includes detailed information including all possible process paths, participants and number of times each flow is executed etc.

Conclusion
In my opinion, process mining techniques can be extremely useful in various different scenarios, such as:
- Process analysts can use these techniques to verify process models i.e. to ensure that all possible process paths and participants have been captured. These techniques can also be very valuable at the analysis and optimization stages.
- As more and more organizations make Internet of Things (IoT) an integral part of their processes (see auto insurance industry, waste management industry), we will need to mine data generated from these IoT devices. This data will help in understanding how these IoT devices create their own process highways.
Currently, the tools available for process mining are mostly standalone and have a relatively higher learning curve, as a result, there might be some reluctance on their usage. Even if you are not planning to mine data using the tools, the techniques themselves can be used. You can use the events log data to manually run all possible scenarios to make sure that the process model can handle real life situations.
Business Process Management Software (BPMS) vendors do provide simulation features, but they only work on historical data generated by the BPMS. So BPMS vendors need to add process mining features in their offerings as well (either by building from scratch or acquiring and integrating the already available tools).
If you are more interested in learning about process mining techniques then visit the links provided in the references section.
References
- Process Mining: Data science in Action
- ProM 6 Tutorial
- Discovering, Analyzing and Enhancing BPMN Models Using ProM
- Fluxicon – Webinar introducing a commercial process mining tool based on ProM